Your First Tattoo Checklist: What to Know Before You Get Inked
Your first tattoo is one of the few decisions you will literally carry for the rest of your life. After 35 years in studios across the country, from Las Vegas to New York to Honolulu, I have watched thousands of first-timers walk in excited and leave glowing. I have also watched some walk in completely unprepared and leave with a result that did not match their vision.
The difference almost always comes down to preparation. Not talent. Not budget. Not even pain tolerance. Just knowing what to do, in the right order, before you ever sit in the chair.
This first tattoo checklist walks you through all 15 steps, from defining your concept to healing your finished piece. Whether you are getting a small fine-line piece or starting a full sleeve, this guide gives you everything you need to make your first tattoo experience smooth, safe, and exactly what you imagined.
Clarify Your Tattoo Concept and Define Your Vision Before Committing
The single biggest mistake first-timers make is showing up to a consultation with no clear idea of what they want. A vague brief produces a vague tattoo.
Before you book anything, take real time to sit with these questions:
What do you want this tattoo to represent?
Is this personal? a tribute, a milestone, a belief? Is it purely aesthetic? Is it cultural? Understanding your own motivation will guide every other decision, including placement, size, and style. Tattoos that mean something specific to the person wearing them age far better emotionally than impulse pieces.
Where are you drawing visual inspiration from?
Collect references. Save images to your phone. Build a folder. Do not just save one image. Collect 8 to 12 that share a quality you respond to. This gives your artist the raw material they need to understand your visual language.
Are you locked in, or open to collaboration?
The best tattoos I have ever produced came from clients who had a strong core idea but trusted me to interpret it. Do not come in demanding a pixel-perfect reproduction of a Pinterest image. Come in with a direction and a willingness to let a skilled artist elevate it.
Give yourself at minimum two weeks of living with an idea before you commit. If you still love it after two weeks, you will almost certainly love it after twenty years.
Choose the Right Tattoo Style and Find an Artist Who Specializes in It
Tattooing is not one art form. Dozens of art forms use the same tool. The style you choose will determine which artist you need and choosing the wrong artist for your desired style is one of the most common and most preventable first tattoo mistakes.
Here is a brief guide to the main styles and what they require:
Black and Grey Realism
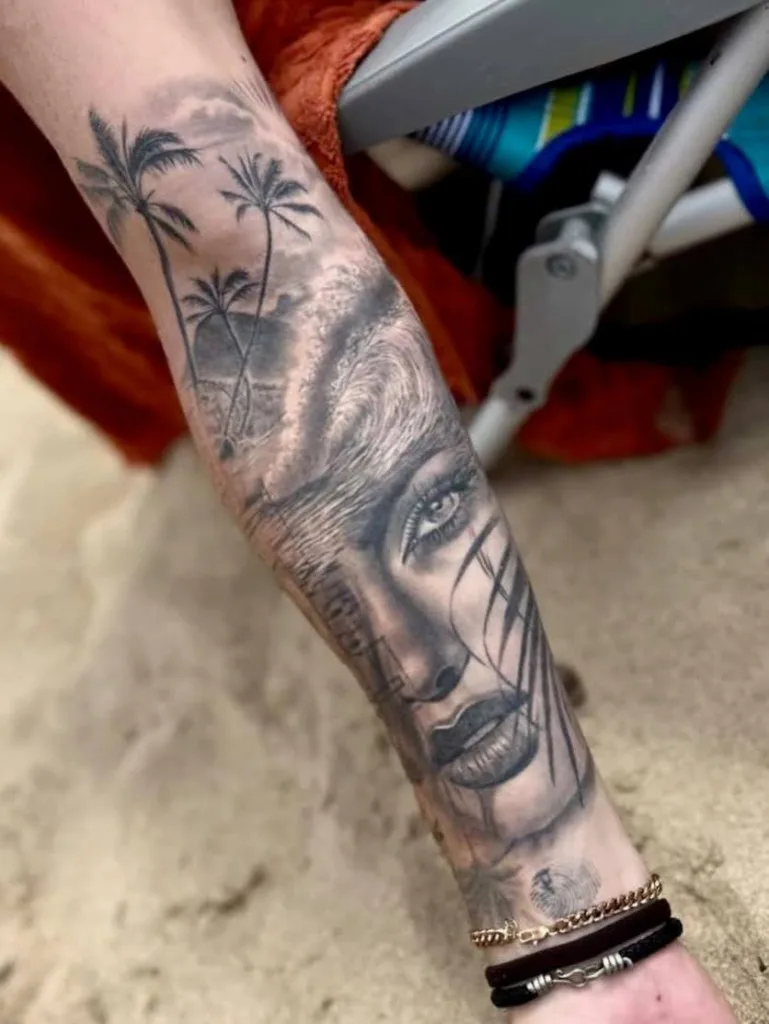
Black and Grey Realism produces photographic-quality portraits, landscapes, and detailed imagery using gradients of black ink. This is technically one of the most demanding styles and requires an artist with a strong portfolio, specifically in realism, not just general tattoo work. This is the style Skin Design Tattoo is globally recognized for.
Fine Line Tattoos
Fine Line uses single-needle or very thin needle configurations to create delicate, precise linework. It is beautiful when done correctly, but it demands an artist who specialises in it. Fine line tattoos are also highly sensitive to size — a design that looks stunning at 5 inches will become illegible at 2 inches.
Traditional and Neo-Traditional Tattoos
Traditional and Neo-Traditional use bold outlines and solid colour fills. These are among the most durable tattoo styles over time because the bold lines resist spreading and the solid fills maintain saturation.
Japanese Tattoos
Japanese Tattoo is a rich style built on centuries of iconography, koi, dragons, chrysanthemums, and tigers, executed with specific compositional rules that make large-scale pieces work with the body’s natural flow.
Illustrative and Geometric
Illustrative and Geometric blends drawing-style linework with graphic design sensibilities. Great for clients who want something with a contemporary, artistic quality.
The critical rule: look at an artist’s portfolio and find work they have already done in your desired style. Not similar work. Not adjacent work. Exactly your style. A traditional artist producing realism portraits will rarely give you the result you are imagining.
Colorful tattoo done by Brad Charles, next to black and grey leg sleeves by Jake Ingersoll.
Research and Select the Right Artist by Focusing on Portfolio Rather Than Price
Your artist selection is the most consequential decision in this entire process. More than placement. More than design. The artist determines the quality of the outcome.
How to evaluate a portfolio correctly
Look for healed work, not just fresh tattoos. Fresh tattoos always look saturated and crisp. Healed tattoos, photographed 6 to 8 weeks after the session, reveal the true quality of the work. Look for clean lines that have not spread, smooth gradients that have not been patched, and solid fills that have not faded unevenly. Any reputable artist will have healed photos available.
Look for consistency across the portfolio. One exceptional piece surrounded by mediocre work tells you that the exceptional piece may have been a best-case scenario. You want consistent quality across 20 to 30 pieces before you trust an artist with your skin.
Understand tattoo needle depth
One thing most clients never ask about, but that separates skilled artists from careless ones, is control of needle depth. Ink must be deposited in the dermis, the second layer of skin, at a precise, consistent depth.
Too shallow, and the ink falls out during healing. Too deep and the ink bleeds and spreads, causing a blowout. When you consult with an artist, do not be afraid to ask how they approach needle depth management for your specific skin type. A skilled artist will have a clear, confident answer.
Check reviews across multiple platforms
Google reviews, Yelp, and the studio’s own testimonials. Pay particular attention to how the studio handles concerns, a professional studio responds constructively and respectfully to all feedback.
Every artist of Skin Design Tattoo on our roster has been selected specifically for their technical mastery in their style specialty. Browse our artists at skindesigntattoos.com/artists.
Decide on Tattoo Placement and Consider How It Will Age and Fit Your Body
Placement is not just about where you want to show the tattoo or hide it. It affects how it ages, how it fits your body’s natural architecture, and how it will connect to any future work.
Visibility considerations
Think honestly about your professional environment. A forearm tattoo is increasingly accepted in most modern workplaces, but placement on the hands, neck, or face carries social implications that go beyond aesthetics. Think five years ahead, not just today.
Body flow and composition
A good tattoo works with the natural lines and muscle structure of the body. A design placed on the outer upper arm, for example, should flow with the curvature of the arm rather than fight it. This is one of the most valuable things an experienced artist brings to a consultation. The spatial understanding of how a design will sit on a moving, three-dimensional body.
Planning for future tattoos
If you think you may want more tattoos in the future, a sleeve, a chest piece, or a connected back piece, your first tattoo’s placement should account for that. I have re-worked many first tattoos because they were placed without considering the larger canvas. A consultation with your artist before committing to placement is the best investment you can make.
Body areas that move and stretch
Placement in areas subject to significant movement and weight change, the abdomen, inner arms, and backs of knees, will age differently than placement on more stable areas. This does not mean avoiding them, but it is worth understanding going in.
Black and grey tattoo realism portrait tattoo by Skin Design’s very own Cat Castro (also featured on Ink Masters!)—click here to book your free consultation today
Choose the Right Size for Your Tattoo and Avoid Going Too Small
This is one of the most consistent pieces of advice I give first-timers, and one of the most consistently ignored: the minimum recommended size for a tattoo with any meaningful detail is almost always larger than the client initially imagines.
Here is why
The skin is not paper. It is a living, breathing, stretching organ. Ink placed in it is subject to a process called pigment migration, the gradual, natural movement of ink particles through the dermis over time. A fine-line design with intricate details in a space that is too small will not stay fine and intricate. Within a few years, it will compress into a blurry, indistinct shape.
The practical rule of thumb
Any design with real detail, portraits, lettering, complex geometric patterns, fine floral work, needs at least 3 to 4 inches to maintain clarity over time. Simpler designs with bold lines can go smaller. Talk to your artist about the minimum workable size for your specific design during your consultation.
On fine line specifically
Fine line tattoos are one of the most popular styles right now, and they are absolutely stunning when done correctly. But they are also the most vulnerable to size-related degradation. If you want fine line work that holds, your artist needs to size it appropriately and use the right needle configuration. Do not choose an artist who agrees to make any fine line piece as small as you want without pushing back — that is not an artist putting your long-term result first.
Book a Consultation and Make Sure You Don’t Skip This Important Step
A consultation is not just a meet-and-greet. It is the most important quality-control step in the entire process, and skipping it is one of the clearest signs a studio does not prioritise your outcome.
What a proper consultation covers
Design refinement. Your artist will review your references, understand your vision, and translate it into a workable design. This is where rough ideas become actual tattoo concepts. A skilled artist will also flag any elements of your design that will not hold up over time — overly fine detail, problematic spacing, size issues — and suggest solutions.
Placement confirmation. Your artist will physically look at the placement area, assess your skin tone and texture, and confirm whether the design works in that location.
Size agreement. The artist will propose a size based on your design’s complexity and confirm it with you before anything is drawn up.
Pain and session length expectations. Your artist should give you an honest estimate of session length and a realistic assessment of pain level for your placement.
Tattoo shop etiquette you need to know
Deposits are standard practice and are almost always non-refundable. This is not a scam — it compensates the artist for the time they invest in design work before your appointment. Respect this.
Tipping is standard. A 15 to 20 percent tip on top of the tattoo price is the industry norm. If your artist does exceptional work, tip at the higher end. Plan for this in your budget.
Come to your consultation clean and sober. Arrive on time. Bring any reference images you have collected. Put your phone away and be present — your artist is giving you their full attention and deserves yours in return.
Book your consultation with Skin Design Tattoo at skindesigntattoos.com/tattoo-consultation.
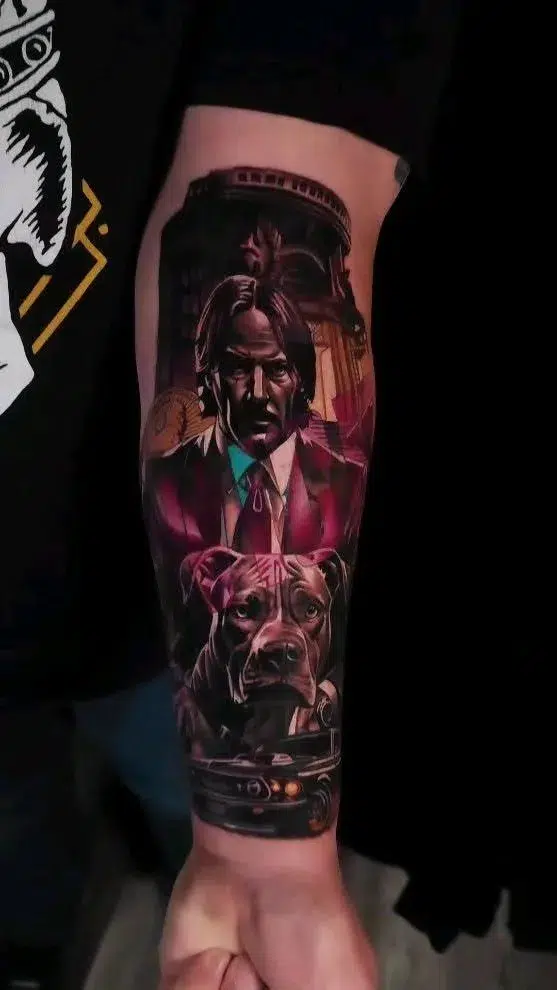
John Wick realism tattoo sleeve by Skin Design Tattoos’ resident artist in Nashville. Check out his work and text ‘JAKE’ to book a free consultation on a custom design of your own.
Understand the True Cost of Your First Tattoo and What to Expect
One of the most common sources of disappointment for first-timers is not understanding the full cost before committing. Here is an honest breakdown.
Shop minimum
Most professional tattoo studios charge a shop minimum regardless of how small the piece is. This typically ranges from $80 to $150. It reflects the cost of sterilization, setup, materials, and the artist’s time even for a very brief session.
Small tattoos (under 3 inches, simple design)
$100 to $300 depending on the studio, the artist’s experience level, and the city.
Medium tattoos (3 to 6 inches, moderate detail)
$300 to $700 is a reasonable range for quality work from an experienced artist.
Large custom work (full sleeve, back piece, chest piece)
Significant pieces from senior artists at established studios start at $500 per session and often require multiple sessions. A full sleeve can run $3,000 to $8,000 or more depending on detail level and artist reputation.
Artist experience premium
A tattoo from a world-class artist will cost significantly more than a tattoo from a newer artist at a budget studio. That premium reflects years of practice, precise technical skill, and — critically — the difference between a tattoo that looks incredible for decades and one that degrades in five years. Invest in quality.
Always budget for your tip
A 15 to 20 percent tip is expected and deserved for good work. On a $400 tattoo, budget an additional $60 to $80 in cash.
Skin Design Tattoo also offers flexible financing through Affirm and Klarna, with plans up to 24 months and options starting at 0% APR. Details at skindesigntattoos.com/financing.
Hydrate and Prepare Your Skin to Ensure a Better Tattoo Experience
The quality of the surface your artist works on directly affects the quality of the finished tattoo. Hydrated, healthy skin accepts ink more cleanly, shows finer detail more accurately, and heals more consistently than dry, neglected skin.
7 days before
Begin moisturizing the tattoo area twice daily with an unscented lotion. Avoid fragranced products — they can irritate the skin. The goal is to build healthy skin hydration, not to apply product the day before.
48 hours before
Increase your water intake significantly. Aim for at least 8 to 10 glasses of water per day. Internally hydrated skin is noticeably easier to work with and holds ink more cleanly.
24 hours before
Stop moisturizing the specific area being tattooed. You want the skin hydrated from within, but you do not want a layer of lotion sitting on the skin surface when your artist begins work. Clean, dry skin takes stencils and ink more precisely.
Full-back piece done by Las Vegas & OC tattoo artist Robert Pho—text us at 702-297-6079 to make your vision a reality
Day of
Do not shave the area yourself unless your artist has specifically asked you to. Improper shaving can cause micro-irritation that affects the skin surface. Most artists will shave the area themselves as part of their prep process.
Sun exposure
Avoid significant sun exposure on the placement area for at least a week before your appointment. Sunburned or sun-damaged skin is very difficult to tattoo cleanly and will affect the final result.
Eat the Right Meal to Fuel Your Body for the Tattoo Session
Tattooing is a physical stress on the body. Your blood sugar, energy level, and hydration status during a session all affect how you feel and how your body responds to the needle. Clients who skip meals before their appointment are the ones who go lightheaded, need unplanned breaks, and occasionally faint.
Eat a full meal 2 to 3 hours before your appointment
A balanced plate of complex carbohydrates and protein is ideal, think whole grain toast with eggs, oatmeal with nut butter, rice with chicken, or a substantial sandwich. Complex carbohydrates give you sustained energy that does not spike and crash mid-session.
Include Vitamin C
Foods rich in Vitamin C, oranges, bell peppers, strawberries, kiwi, support skin health and the body’s natural healing response. Adding a Vitamin C-rich element to your pre-session meal is a simple, beneficial habit.
Avoid alcohol entirely
Even small amounts of alcohol the morning of your appointment will thin your blood and increase bleeding during the session. Excess bleeding clouds the artist’s visibility, pushes ink out of the skin, and directly compromises the quality of the finished tattoo.
Avoid excessive caffeine
A single coffee is fine for most people. However, excessive caffeine raises your heart rate and can cause muscle tremors that make it physically harder to hold still during precise detail work. If you are already anxious about the session, skip the extra espresso.
Bring a snack and a drink
For sessions over 2 hours, bring a small snack, nuts, a granola bar, fruit, and a non-alcoholic drink. Your artist will welcome short breaks, and keeping your blood sugar stable throughout a long session makes a real difference.
Avoid Blood-Thinning Medications and Alcohol
This deserves its own section because the consequences of getting it wrong are directly visible in the final tattoo.
Do not take aspirin or ibuprofen within 24 hours of your session.
Both are blood-thinning medications that reduce the blood’s ability to clot. During tattooing, this means significantly more bleeding from the needle punctures, which pushes ink back out of the skin as it is being deposited. The result is inconsistent ink saturation, patchy fills, and blurred linework — all problems that are difficult or impossible to correct without a full rework.
Acetaminophen (Tylenol) is generally considered safe as a pain reliever before tattooing, as it does not have the same blood-thinning effect. However, always consult your own physician if you are on any prescription medication regimen.
If you are on prescription blood-thinning medications, warfarin, clopidogrel, rivaroxaban, or similar — you must consult your prescribing physician before your tattoo appointment. Do not simply stop taking a prescription medication without medical guidance. Your doctor and your artist can work together to identify the safest timing and approach.
No alcohol for at least 24 hours before your session. The night before your appointment should be an early night with water, a good meal, and eight hours of sleep. Not a celebration.
Healed tattoo by Skin Design Tattoos Las Vegas artist. Ready to brainstorm tattoo ideas? Text us at 702-297-6079 or send us a message today.
Wear the Right Clothing for Practical Preparation (You Shouldn’t Overlook)
Your clothing choice on tattoo day has a direct and practical impact on your session. This sounds trivial until you are an hour into a shoulder tattoo in a tight-collared shirt that cannot be moved out of the way.
The rule is simple: wear something that provides easy, unobstructed access to the area being tattooed without requiring you to undress completely.
For arm tattoos, upper or lower wear a sleeveless top or a loose short-sleeve shirt you can roll or push aside without resistance.
For shoulder or upper back tattoos, wear a loose button-down shirt or a zip-up hoodie you can take off easily and put back on over a fresh wrap.
For rib or side tattoos, a loose-fitting top you can lift and secure, or a sports bra for the session, is practical.
For thigh or leg tattoos, wear shorts or loose-fitting trousers that roll easily above the knee.
After the session, whatever you wear out of the studio will be in contact with fresh, wrapped tattooed skin for hours. Avoid tight or rough fabric against the tattooed area. Dark colours are advisable since minor ink and blood transfer from the wrap is normal.
Understand Your Pain Level with an Honest Guide to Tattoo Pain by Location
Pain is the thing first-timers ask about most and worry about most unnecessarily. The reality is that for the majority of placements, tattoo pain is very manageable — particularly for sessions under two hours.
The most honest description I can give: most tattoo pain feels like a persistent, sharp scratching sensation. Not unlike a cat scratch that simply does not stop. The intensity varies considerably by placement.
Pain by body location
Body Area | Pain Level | What It Feels Like |
Outer upper arm | Low | Mild scratching, very manageable |
Outer thigh | Low | Light pressure and scratching |
Forearm (outer) | Low–Medium | Consistent mild scratching |
Calf | Low–Medium | Pressure with occasional sharpness |
Upper back | Medium | Dull ache, more noticeable over time |
Chest (off-centre) | Medium | Pressure and scratching combined |
Inner arm/bicep | Medium–High | Sharper, more sensitive skin |
Stomach/abdomen | Medium–High | Skin movement makes it unpredictable |
Spine | High | Deep vibration, aching intensity |
Ribs | High | Sharp, biting sensation on every breath |
Inner elbow / ditch | High | Very sensitive, brief but intense |
Hands and feet | High | Thin skin over bone — significant discomfort |
Neck | High | Very sensitive, not recommended for first tattoos |
Some studios, including Skin Design Tattoo, offer topical anesthesia options that can significantly reduce pain for sensitive placements or clients with low pain tolerance. Ask about anesthesia options during your consultation, it is a completely normal request. Learn more at skindesigntattoos.com/anesthesia.
How to manage pain during the session: Breathe slowly and deliberately. Long exhales reduce tension and lower perceived pain. Let your artist know if you need a break — any professional artist will accommodate this without judgment. Bringing a small distraction like headphones and a podcast can help significantly on longer sessions.
What to Expect During Your Tattoo Session from Start to Finish
Knowing what is about to happen before it happens is one of the most effective ways to reduce anxiety and stay relaxed during your session.
Arrival and check-in
Bring a valid government-issued photo ID. You will be asked to sign a consent and health disclosure form. This is standard, legal, and required at every professional studio. Review it honestly, disclose any skin conditions, medication use, or health factors that are relevant.
Stencil application
Your artist will transfer a stencil of your design onto the placement area using stencil solution. You will be asked to review the position, size, and orientation before any tattooing begins. This is your last opportunity to adjust placement. Take it seriously, look in a mirror, consider it from multiple angles, and only confirm when you are genuinely satisfied.
The tattooing process
The artist begins with outlining, the most precise phase of the work, before moving to shading, detail work, and fills. Outlining typically produces the sharpest sensation. As shading begins, many clients find the sensation mellows into a duller, more manageable feeling.
Nature-themed realism tattoo by Las Vegas tattoo artist, Natalie Shaw. Text ‘SHAWTY’ to (702) 297-6079 for a free consult on a custom design
The tattooing process
The artist begins with outlining, the most precise phase of the work, before moving to shading, detail work, and fills. Outlining typically produces the sharpest sensation. As shading begins, many clients find the sensation mellows into a duller, more manageable feeling.
Communication throughout
A good artist expects and welcomes communication. If you need a break, feel lightheaded, are uncomfortably hot or cold, or simply need a moment, say so immediately. Do not push through discomfort in silence; it helps neither of you.
Completion and wrap
Once the work is complete, your artist will clean the area, photograph the finished piece, and apply a protective covering, either traditional plastic wrap or a modern breathable adhesive film like Saniderm or Tegaderm. They will walk you through specific aftercare instructions before you leave. Listen carefully and ask any questions you have before you walk out the door.
How to do Aftercare and Navigate the Healing Stages of Your Tattoo
The tattoo session is only half the work. How you care for your tattoo in the weeks following your appointment will determine whether that investment in quality artist work shows fully or gets compromised by poor healing.
The healing stages
Days 1–3 (Acute healing)
The tattooed area will be red, tender, and slightly swollen. This is normal inflammation — your body’s immune response to the tattooing process. Keep the area clean, keep it covered when instructed, and do not touch it with unwashed hands. Wash gently with unscented antibacterial soap using clean fingers only — no cloths or sponges. Pat dry, do not rub.
Days 4–7 (Peeling begins)
The outer layer of skin will begin to peel and flake, often with a milky or cloudy appearance. This is completely normal — it is the damaged outer skin shedding to reveal the healed skin beneath. Do not pick, scratch, or peel. Picking pulls out ink that has not fully set, creating light patches in the finished tattoo.
Week 2 (Deeper healing)
The surface skin continues regenerating. The tattoo may look slightly dull or faded during this phase — this is normal and temporary. Continue gentle moisturising with an unscented lotion. A thin layer is enough; over-moisturising can clog pores and slow healing.
Weeks 3–4 (Outer healing complete)
The surface skin should be fully healed. The tattoo will look clearer and more settled. Note that deep skin layers continue healing for up to 3 months — the tattoo will continue to sharpen and clarify during this time.
Signs to watch for
Prolonged heat and redness after day 3, unusual swelling, continuous oozing beyond the first day, or a foul smell are signs of possible infection. These are uncommon in properly cared-for tattoos but require prompt medical attention if they occur. Contact a doctor, not your tattoo artist, for medical concerns.
What to avoid during healing
Direct sun exposure (use SPF 50+ once fully healed, and protect from direct sun indefinitely to prevent fading), swimming in pools, lakes, or the ocean, soaking in baths or hot tubs, and tight clothing rubbing against the area.
Product guidance
Unscented lotion (Lubriderm, Aveeno unscented, CeraVe) is widely recommended by professional artists. Avoid petroleum-based products like Vaseline on newer tattoos as they can draw ink to the surface. Avoid products with fragrance, alcohol, or harsh additives.
Common First Tattoo Mistakes to Avoid
The checklist above covers what to do. Here is a consolidated list of the most common things that go wrong, so you can avoid them entirely.
Rushing the decision
A tattoo takes two weeks to get. It lasts a lifetime. Give your concept the time it deserves.
Choosing an artist based on price rather than portfolio
The cheapest tattoo is almost always the most expensive mistake. A poor tattoo requires expensive laser removal or cover-up work to fix. Invest in quality from the start.
Skipping the consultation
There is no substitute for a face-to-face conversation with your artist before your appointment. Do not skip it.
Going too small
Especially for fine line and detailed work. Size affects longevity. Your artist will guide you — trust their professional assessment over your instinct to minimise.
Neglecting skin preparation
Dehydrated, dry, or sun-damaged skin produces inferior results and heals unpredictably. The week before your appointment is part of the process.
Ignoring aftercare
The tattoo session produces the design. Aftercare determines how that design heals and looks for the rest of your life. Follow your artist’s instructions precisely.
Bringing a large group
One support person is fine. A group of five friends is a distraction to you, your artist, and the studio environment. Keep it calm.
Not tipping
Your artist is a skilled professional who has invested years in their craft. Tip appropriately.
The 24-Hour Final Countdown Your Pre-Appointment Timeline
Timeframe | What to Do |
7 Days Before | Begin moisturising twice daily. Avoid sun on the placement area. |
48 Hours Before | Hydrate aggressively. 8–10 glasses of water per day. No alcohol begins now. |
24 Hours Before | Last full moisturise of the area. Get 8 hours of sleep. No alcohol, no aspirin or ibuprofen. |
Day of (morning) | Eat a full, balanced meal with complex carbs and protein. Light caffeine only. |
3–4 Hours Before | Stop eating heavy food. Pack your bag: photo ID, cash for tip, snack, water, headphones. |
At the Studio | Arrive on time. Phone away. Be present. Review the stencil carefully before giving approval. |
Post-Session | Follow your artist’s specific aftercare instructions before you leave. Ask any questions. |
Conclusion
Your first tattoo is a significant decision, and with the right preparation, it can be one of the most rewarding experiences you have ever invested in. The 15 steps in this checklist exist because I have seen, over 35 years, exactly where first-timers get tripped up. Follow them, take them seriously, and walk into your appointment as an informed, prepared client.
At Skin Design Tattoo, we have spent decades building studios that make the first tattoo experience, and every tattoo experience, exceptional. From our world-class artists to our welcoming environments across Las Vegas, New York, Honolulu, Orange County, Nashville, and Caesars Palace, we are built for this.
Frequently Asked Questions
How much does a first tattoo cost?
Most professional studios charge a shop minimum of $80 to $150. Small to medium pieces typically run $150 to $500. Large custom work from experienced senior artists starts at $500 per session and can reach several thousand dollars for sleeves or large back pieces. Always add 15 to 20 percent tip on top of the tattoo price. Skin Design Tattoo offers financing through Affirm and Klarna for larger pieces.
What should I do the night before a tattoo?
The night before your appointment: avoid alcohol entirely, eat a nutritious dinner, drink plenty of water, and get 8 hours of sleep. Do not take aspirin or ibuprofen. Stop moisturising the specific tattoo area. Set everything you need — photo ID, cash for tip, comfortable outfit — out the night before so the morning is stress-free.
How bad does a first tattoo hurt?
Most first-timers find tattoo pain very manageable, especially for placements on the outer arm, forearm, or thigh. The sensation is most commonly described as a persistent scratching or light burning — not the sharp, acute pain most people imagine. Pain varies considerably by placement — the ribs, spine, and inner elbow are significantly more intense than the outer arm. Sessions under 2 hours are generally very manageable even for people with low pain tolerance. Skin Design Tattoo also offers topical anesthesia options for sensitive placements.
Can I take painkillers before a tattoo?
Avoid aspirin and ibuprofen — both are blood-thinning medications that cause excess bleeding during the session, which directly affects ink quality. Acetaminophen (Tylenol) is generally considered acceptable as it does not thin the blood, but consult your physician if you are on any prescription medications. Topical numbing options are available at Skin Design Tattoo — ask during your consultation.
How long does a first tattoo take?
A small, simple piece (2 to 3 inches) typically takes 1 to 2 hours including setup and stencil time. Medium pieces with moderate detail run 3 to 5 hours. Large or complex custom work is often split across multiple sessions. Your artist will give you a realistic time estimate during your consultation.
What should I wear to my tattoo appointment?
Wear loose, comfortable clothing that provides easy access to the area being tattooed without requiring you to undress fully. For arm work, wear a sleeveless top or loose short sleeves. For back work, wear a zip-up or button-down you can remove. Bring or wear something dark on the bottom half — minor ink transfer onto clothing is normal.
How do I know if my tattoo is healing properly?
Normal healing: redness and tenderness for days 1 to 3, peeling and flaking in week 1 to 2 (do not pick), milky or cloudy appearance as new skin forms, then clearing and sharpening by weeks 3 to 4. Concerning signs include prolonged heat and redness after day 3, continuous oozing beyond day 1, unusual swelling, or foul smell. Consult a physician — not your tattoo artist — if you have medical concerns about your healing.
What is proper tattoo shop etiquette?
Arrive on time or a few minutes early. Bring valid photo ID. Come clean and sober. Bring cash for your tip (15 to 20 percent). Limit guests to one support person if needed. Put your phone away during the session unless your artist is comfortable with it. Respect the space and the other artists and clients in the studio. Deposits are standard and non-refundable — honour the commitment you made
Ready for Your First Tattoo? Start With the Right Process
Getting your first tattoo doesn’t have to feel overwhelming.
With the right preparation—and the right artist—it becomes a process you can trust.
At Skin Design Tattoos, we guide first-time clients through every step—from idea to execution to healing.
Text 702-297-6079 to start your consultation and take the first step with confidence.
We have studios in:
About the Author: Robert Pho has been tattooing since 1989 and is the founder of Skin Design Tattoo, with 7 national locations across Las Vegas, New York, Honolulu, Orange County, Nashville, and Caesars Palace. Featured in the LA Times, FOX 5, Skin Magazine, and Rebel Ink. Learn more at robertpho.com and skindesigntattoos.com.
Medical Disclaimer: The skin preparation, nutrition, and medication guidance in this article is general informational content only and does not constitute medical advice. If you have a skin condition, are on prescription blood-thinning medications, or have any health concerns, please consult your physician before your tattoo appointment.